At last I've moved indoors but not until after I had done lots of staring and thinking before doing so! I really had to do this to be sure of my work plans so that I get everything done in the right order as I go along. Building, decorating and lighting a 3d building is abit of a mind boggling affair! To work it all out I sat down and wrote a plan of action - where to route the wires for the lighting and which piece of wall can I stuck in and when? Can I lay this flooring now, at which point will I need to glaze that window and add curtains....? etc etc.
Well the first thing I decided to do was to make the channels for the lighting wires to go through to the back of the building....I knew I had to do this before any walls could be stuck in place or flooring laid. The chimney breasts were glued into position at this stage too so that I could get the wires lined up for the fires....
So far so good - the channels for the wires from the shop lights downstairs and for both fires on the first floor
My channels are a little wonky as I used the Dremel but they will still do the job.
The shop light coming up into the sitting room and the wire coming into the back of the fireplace ready to connect to the kitchen range and the sitting room fire.
Here you can see the wires laid in and covered with masking tape
And both the fire lights working! Hooray!
Next I needed to get the hallway and landing wallpapered so that I could glue in the two back walls. I also fixed the wall lights into place before sliding and gluing the wall between the landing and the other two rooms on the first floor. It maybe a challenge putting in the cornice and skirting as this area is quite deep. Wish me luck! I will be able to remove the window to glaze it and add curtains.
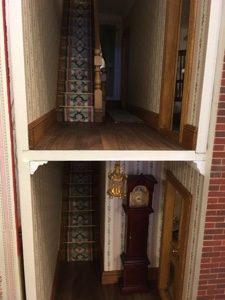
This is the first floor landing. I'm so pleased with how it's looking so far....
The stairs leading to the attic floor and the doors to the kitchen and sitting room not glued in place yet.
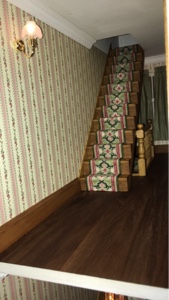
This next picture shows the downstairs entrance hall with the stairs and wall now glued into position and the doorway leading into the shop area.
It took me ages to fix the brass stair rods and I have another set to do yet!
Skirting boards, cornice, door knobs and light switches to add....
Door leading to living quarters
So you are up to date with where I am up to for now...thankyou for looking in!